Our organization is getting better and better. Like... A to-do list right on the wall, with a hanging marker, so that anything can be written down as soon as it's thought of, and checked off when it is completed.
The top exterior section of the kitchen is prepped for plaster...
And the west side, too...
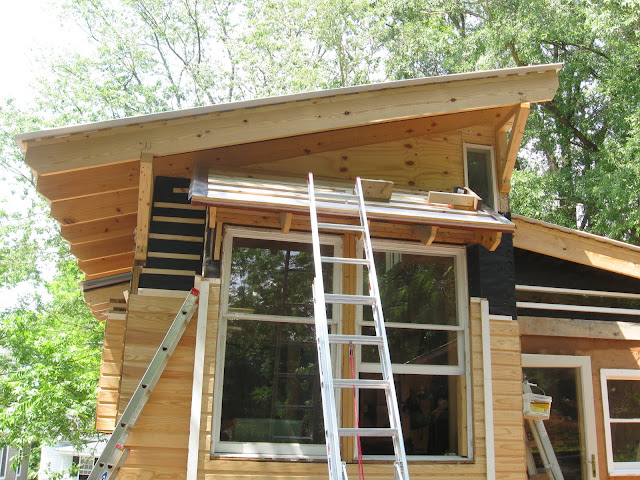
I've been putting off working on this little triangle of space above the bay window because it's so hard to get to. I removed the metal roofing one sheet at a time, and built little mini-scaffolds (to hold one foot each) onto the roof structure so that I can sit up there and work.
I am almost done getting it prepped for plaster. After the plaster, the metal roof can go back on.
What's a day like in the life of Jeremy? He's been working on trim quite a bit this week.
Measuring:
Scampering with the cut piece (after a t-shirt swap, or a change of day):
Lining the piece up with the one above:
Top nail with the gun:
Checking for "plumb":
And then more nails... For the record, we are only using the nail gun for some of the trim nails. We originally borrowed it to do the trim pieces around the glass in our custom window frames. You can imagine how frightening it would be to attempt to nail in trim with a hammer within an inch of your custom, double-pane glass. The nail gun is much safer for the glass. Jeremy and I hand-nailed all of the wooden siding, the old-fashioned way.
Here, Mike applies the first blob of earthen plaster:
Here's the behind-the-scenes look prior to plaster. The white aluminum flashing is directly against the tar paper. Then the thin strips of wood. And then the chicken wire mesh. Ready for plaster.
We constructed a new set of scaffolds this morning, but they were not quite high enough for me to reach the top corner. Plastering that particular spot was quite unpleasant.
Photos of the roof for my father (he's been asking for a while now). It's tough to get a photo of the roof from on the roof, but you can get an idea of what it looks like from these window shots:
A photo through a window into the building, at the other windows:
Mike putting the final plaster touches around the windows. This is just the first coat of plaster. The next coat will be smooth and very fine.
I setup the scaffolds around the bend, and Jeremy and I plastered half of the west side before the day was through:


Yes, finally some shots of the roof. I will be interested in seeing what fills the space from the end of the roofing material near the house and the side of the house (now yet plastered in the photos). Will rain pelting against the roof wash away the plaster? Or is there some kind of flashing that goes in between?
ReplyDeleteI love this house. You are really making progress!
ReplyDeleteI'm ready for my three week update now.
ReplyDelete