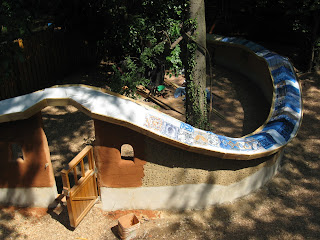
I found a goldmine of backyard garden wall photos today! I could very well be mistaken, but I don't think these were ever posted. The last time you saw it was probably like this:
And then a lot more happened...
Decking the roof with 1X6s (notice how much the color of the cob lightened when it dried):
Extending the roof framing over the gates:
Applying stucco over the concrete block. This particular photo was taken a day after I stuccoed - it looks pretty neat and tiger-stripe-like as it dries. Eventually it all dried to be a consistent, boring gray.
Plastering the wall (with clay from Pickard's Mountain - the same plaster in the interior of Margaret's cottage):
Plaster detail around the little arched window:
The quality of light..... ahhhhhhhh....:
This is the view that my nephew will have of the wall, at least for another year.
In the above photo, notice how nicely and evenly the edge of the decking is overhanging the end of the rafters- about an inch and a half all the way around. I thought it was a pretty great aesthetic move. After it was all done, I thought to myself: "now what am I going to attach the fascia boards to?" Previously, I had attached fascia into the ends of the rafters, because there was no overhanging decking in the way. I ended up having to go around and attach a block of wood at the end of every rafter as a solution. It was time-consuming, and a great reminder to NEVER MAKE THIS MISTAKE AGAIN.
Although a completely different style than the house, I like how they look juxtaposed next to one another:
The first layer of the green roof was carpet underlay, from a nearby carpet store dumpster:
The next step was to put the impermeable plastic layer over the entire wall, and then wait for a praying mantis to bless the project:
The fascia boards went on after the plastic, to lock it into place:
Then pool liner sample scraps over the plastic. (And a layer of dumpstered carpet on top of this):
And then soil/compost! (which needs to be planted eventually, with sedums).


I can imagine the wall with sedums and other little plants already. It is going to look really beautiful.
ReplyDeleteThese are definitely photos we haven't seen before here or on the nephew blog. I look forward to seeing it in person.
ReplyDelete