Thursday, November 17, 2011

Non-Building Life

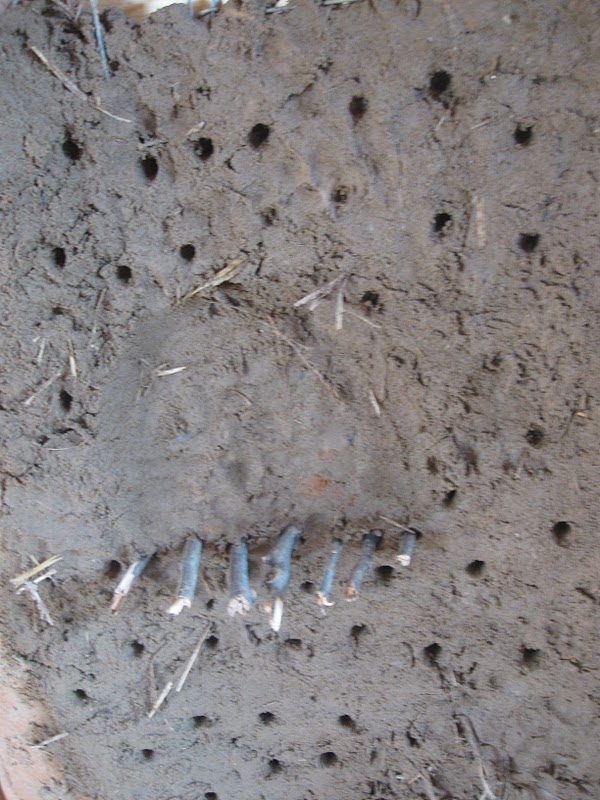
Included in my non-building life is, of course, building. Danielle, Leo, and I went to a fundraising event at Circle Acres a couple Saturdays ago. Here, Mike and I are helping our friend Gray apply a mixture of "daub" to the chicken wire "wattle" on the house he's building (if you're curious, research "wattle-and-daub" and you'll find a lot of cool stuff). Gray came back to Durham the following weekend to take a big part in painting the house here. He was a professional painter at one point of his life.


This is for Jeremy more than anyone else. Sweet potatoes from the little neglected garden back behind the house! I still haven't harvested them all. They were delicious. I wish you could have enjoyed a taste, Jeremy.


Family! Here's a good capture of how pensive Leo can be:


We got quite a show of color this past weekend, especially from this one Japanese Maple behind our cottage:


Danielle with her new baby-wearing wrap. We've tried a couple different wraps so far, and this is by far her favorite because it allows her to put Leo on her back! So she can start doing things again :)


Leo didn't want to hold still for this one, but you can sort of make out that he's sporting his "born at home" shirt that the midwives left for him.

Inside Stuff

I am so far behind in my posts (due to a current shortage of both time and internet access) that there is just no catching up in a proper manner. Instead, here is a bunch of everything:


The bathroom gets closer and closer to being finished.... The vanity light is in. Below it, the two horizontal pieces of wood are simply for attaching the mirror that Jeremy is going to build in Philadelphia, and bring down here.


The piece of plywood below the mirror zone is the first step in preparations for a tile backsplash for the vanity.


Tomato red tile! After the tile is grouted, then the last major step in completing the bathroom is to trowel a finish plaster onto all of the walls.


Here is the oven vent hood, with a cob-inspired cookbook shelf above it. The shelf will be made of a nice piece of finished red oak plywood, and the sides will be plastered with whatever finish coat the walls receive.


Today, we started to prepare the countertops for the tile job in the kitchen. There will be an in-your-face yellow (mustard) backsplash, and inoffensive tan counter tiles.


A layer of "thin-set" mortar goes on top of the plywood to start things off...


Concrete backerboard is then screwed on over this bed of thin-set. Soon there will be another layer of thin-set, into which the tile will be placed.


Mike was working on the bay sink area, getting it up to the proper height for tile:


And some random interior shots...


Tuesday, October 25, 2011

Concrete Shower Progress... and more first.

The bathroom light/vent fan casts a warm glow on the tongue-and-groove ceiling.


I decided that I wanted to hard-wire in a vanity light, and so I got to experiment with cutting through the lime plaster/earthen plaster/ metal lath, and doing some retro-fit wiring. The top hole is for the light box, the middle hole is where I had to drill a hole through a wall stud to get the cable through, and the third hole is where the switch is to be installed. I was able to then fish the wires behind the plaster to get from one hole to the next, to avoid cutting away more of the finished wall.


I found it very easy to cut through the lime plaster neatly with a flathead screwdriver.


The light is now functional and ready to be mounted properly on the wall, but I'm waiting for the brown patch plaster to dry. Soon the bathroom walls will get the finish coat of plaster!


Here's Jeremy's vanity with the vessel sink installed.


Mike working on preparing the base cabinets for a future tile countertop. Here he goes the extra mile to knock a shim under the edge of the cabinet to level it.


Installing the metal lath:


And plastering over with the scratch coat of plaster:


The concrete shower has been quite a project. These photos are from the day after Mike and I labored for 8 hours straight, troweling yellow stucco around all of the sculptural details to complete the final layer of the shower walls:


You'll notice in the photo above that the bench and floor are not finished. This is because we wanted to do them in a different color (which turned out to be a deep purple). Here is the red and black pigments that I bought to add to the white Portland cement:


Dry-mixing the pigments and cement. The other ingredients that were then added were water and sand.


And here is the finished floor/bench stucco (and a beautiful stone that we mortared in): It's looking quite shiny and very purple in the photo because it is fresh. It will dry to be less shiny and more of a faded purple.


Now all the shower needs is a coat of sealant over the concrete (we're looking for the right product that is both non-toxic and functional), and of course a curtain!


Leo and Danielle making opposite-facing, similar expressions:


A little snuggler, he is.


Saturday, October 15, 2011

Autumn video

This is what's going on...

Monday, September 26, 2011

A house feel by the end of October?

The first update is unrelated to building, but instead to my newest title of father/builder! Here I sit in front of this screen with my new boy, Leo. He was born on the 31st of August at 5:40 AM on an earthen floor  of a cob house. Weighing in at 8 pounds 4 ounces (at birth), he is a strikingly handsome new member of the family. Notice below how in an almost chameleon-like fashion, he adjusts the look of his head to be camouflaged within his surrounding context.


Here he is at about 11 days old...


And here he is with Mommy on the building site.


To see more of Leo(pold), check out his blog.


There is a lot more going on at the work site than I have photos to show for...


Here is Mike showing our friend April how to apply earthen plaster, around the new glass blocks that he installed in the shower stall.


The house is starting to show signs of having cob and earth and curves in it...


Here is the loose fence system I've been using to sculpt with cob. It's a lot like making any other kind of sculpture around a skeleton of metal.


The start of a sculpted niche for a coffee mug or candle (or something less romantic, such as car keys).


The pattern of scratches in the plaster will allow the next layer to stick into the existing one.


Tongue-and-groove pine boards stained and polyurethaned, and waiting to make themselves into a ceiling.


A peek into the custom concrete shower stall:


And today a cut a big hole in the wall for a brand new bathroom window!


The main reason for this window is because I am going to install a baseboard heater along this wall as a temporary heating solution for the winter, and the heaters work best if they are beneath windows (as the cold air drops down, is heated up, and then spit back up into the room, creating a circular draft). And eventually after the addition is built, the door to the bathroom is going to be where the new window is anyway, so we're half a step closer to having a door. The window will of course have a curtain over it, for when one wishes to sit on the throne in privacy.


Water and Electric hook-ups any day now....!