Wednesday, February 29, 2012

The butterfly window is really coming along...


Mike set the rafters on the West side of the house, and is shown here putting up a base coat of plaster between the two roof lines:


On top of the rafters goes 3/4" plywood, and then 3/4" rigid foam to act as both insulation for the roof and as a protective cushioning layer under the EPDM liner (the integral part of a living roof system).


I began setting rafters on the east side of the building...


And here is the finished roof line, all decked and foamed:


The following shots are just random "site photos," to give an idea of what things look like around the house:


The pit below is where we've been mining our clay from to make the cob.


Here's the initial stacking of the bricks for a test-run of the rocket stove heat riser.


It worked great! Incredible draw, and a very clean, almost smoke-free burn.


The light has a expanded metal lath form around it, which will be plastered over with earthen plaster, the end result being a cave-like cob sconce:


Stove pipe embedded in what will be a cob bench, and then exiting the building:


Preparing the pad for the rocket stove:


Setting the bricks into a sand/clay mortar:


Here is the "burn tunnel."


And they are all stacked!


Here Mike is cleaning the rust off of our 55-gallon barrel, and polishing it. The barrel is a very important part of the rocket stove. More later...

Monday, February 20, 2012

Babies, Rafters, Niches, Stoves.

I took Leo for a while on the worksite the other day, giving Danielle a chance to sculpt some niches into the cob wall (one of her favorite cob activities):

'


Eventually I put Leo on my back in our Ergo carrier, and he ended up falling asleep as I was working on the building (after lots of smiling as seen below)!


Anatoly and his daughter Leta down in the MUD PIT, harvesting cob clay:


Doing some rafter work on the west side of the building:


We used salvaged concrete blocks to lay out a quick foundation for what will be a rocket-stove-heated bench, and then began cobbing on top of it, building our "thermal battery." (Check out more on rocket stoves here - this is a rocket-stove-heated bed design, and you can see plenty of other designs by typing in "rocket stove mass heater" on Google).

You can also see Danielle's finished niches in this shot:

Sunday, February 12, 2012

One cob at a time.


Windows in!


Electric line in!


This lightbulb will be covered by a cob "sconce" that will direct the light down onto the path as one enters the building.


Utilizing the amazing sculptural properties of cob, we are turning this ordinary double-pane sash into something a little more interesting for the eyes.


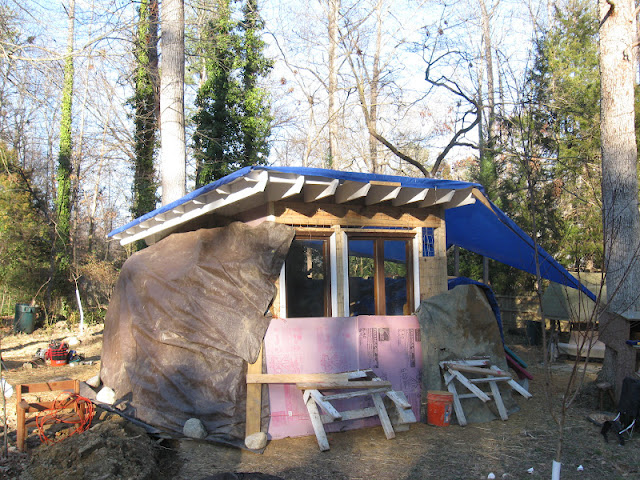
Last night the temperature got down to below 20, and the winds gusted to over 40 mph, so we covered up the cottage well with pink foam insulation, strawbales, and tarps to keep out as much of the cold as possible (the cob is still fresh, and so has a lot of moisture in it, so it's best to avoid letting it freeze for too long.

Friday, February 10, 2012

Winter Cob

Mike and I spent the previous afternoon mixing up cob, so that we would have it ready for the following morning. Because we've been working in semi-cold temperatures (50 at day, freezing at night), we've gotten ourselves into the most pleasant schedule possible for our feet. Using bare feet to mix a wet material in the cold morning is extremely unappealing. But mixing in the late afternoon (especially if the sun pops out) is only slightly numbing. Here's our big pile of cob balls waiting for us in the morning:


Mike is using a "cobber's thumb" (a stick) to poke the necessary holes in the wall that allow for faster drying and easier plaster application.


I wired up the house a couple days ago so that it has one light and a couple outlets. We also found an old cast iron sink at the Habitat for Humanity ReStore that will be cobbed into the wall, and will have a water dispenser above it. The drain pipe extends down into the rubble trench below the stemwall, to carry the greywater away.


I put in a triple layer of 3/4" rigid foam insulation (the pink stuff) in the small triangular wall that separates the two roof lines. We will put lath over this, and eventually an earthen plaster.


The client want a butterfly-shaped window (as well as a caterpillar window, a caterpillar egg window, and a chrysalis window). Here's the start to the butterfly:


The entrance is looking more and more inviting as we build up the walls and remove ugly support braces:


A stone in the wall:

Wednesday, February 1, 2012

Walls going up

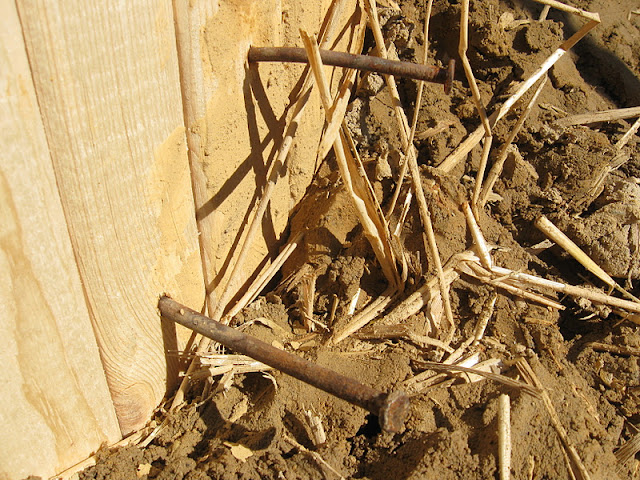
A good use for old, bent nails is as anchors between wood and cob. We just drive them in an inch or so, and then cob around the exposed section, so the two materials are locked together in a way.


In addition to the nails, clay slip is the glue of natural building. Anytime cob is attached to stone, wood, plastic, metal (or anything else other than cob itself), the non-cob material is coated in clay slip to help with bonding.


Kids love cob:


Even babes love cob:


I always enjoy how the gorgeous and artistic a dry-stack foundation looks once there is a nice bond beam of cob running over it.


I went to pick up a couple concrete blocks from the urbanite field this morning and was greeted by a flock of geese!


Mike ripping the tarp with a monster load of cob:


The walls go up quickly with a "bale-cob" system (a hybrid of a strawbale and cob wall). Notice the first course of bales under the blue tarp below: