

A charming look at the North side of the building:

We have been working this past week on the root cellar that is tucked back behind the cob house. You can see it below, looking like a wooden pup tent:

So far we have spent 11 days on the root cellar, broken up over a 2-month period. About a month ago, we poured the concrete floor, shown below:


We sourced oak timbers (4"x8") from a local sawmill, and created a sturdy roof system - strong enough to support the weight of the 12"-thick layer of soil and plants that will ultimately sit atop the root cellar.

Notice the detail below of how the rafters are notched so that they are butting up against the concrete foundation wall in addition to the sill plate. The concrete would have to bust for the building to collapse (making this structure appropriate as a bomb shelter).

From the same sawmill, we bought a whole bunch of pine decking boards, and created the roof deck on top of the oak rafters. The wood is rough-cut lumber, meaning that it has been logged from a forest, and then sawn into lumber at the sawmill. That's it. It hasn't been planed (to make it smooth and even), nor has it been dried in a kiln. This is the difference between rough lumber and the stuff you'd buy at Home Depot. Less processing. It looks a lot more rustic, is (arguably) more fun to work with, and costs less. It's one of the few instances in which you can buy a more local, more natural, more beautiful version of a product and actually have it cost less.


Installing the fascia boards, which will prevent the "living layer" (soil/plants) from falling off the edge of the roof.

The gable end walls (the framed triangle at each end) were insulated with "light straw-clay" insulation. This is simply loose straw that has been lightly coated with clay slip (which is clay soaked in water). Here Mike is mixing the material by hand - tossing it like a salad.

Here is some quick, messy form-work within which we tamped the straw-clay material. These boards are only up for an hour or two. The straw-clay is tamped in between the studs with a 2X4, being compressed as much as possible...

Then after an hour of drying time, the boards are removed to showcase the newly-insulated walls. It's amazing how stiff the material gets so quickly. Just straw, clay, and water. Cheap, easy, and relatively quick. Once it dries, it can be plastered directly over with a clay or lime plaster (we will do lime).

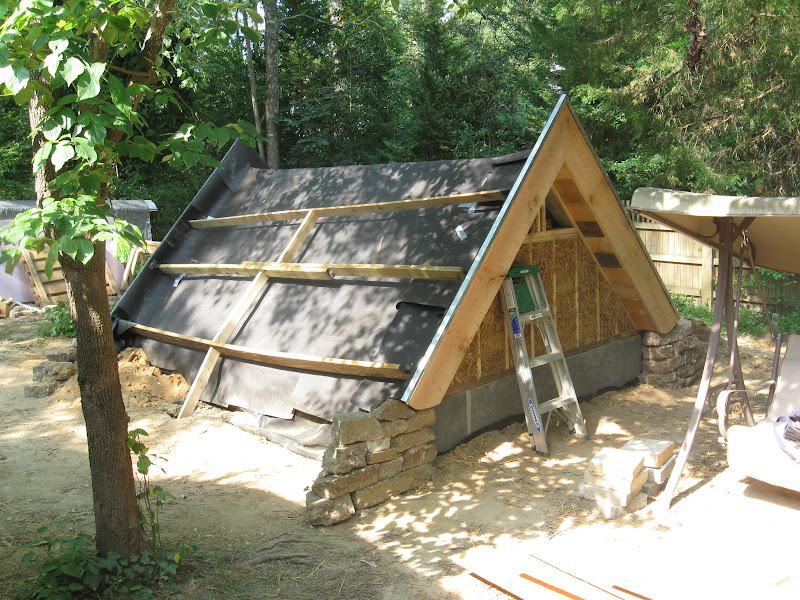
I did some dry-stacking today at each corner of the building to create mini-retaining walls to act as an extension of the fascia, in an effort to contain all the soil that will rise over the building.

The criss-crossing boards that you see running over the tar paper are going to get covered up with soil. They are just functioning to provide some support for the soil until plants take root. Once root systems grow, the soil won't want to go anywhere, but for the first couple months, the loose soil might be tempted to slide off without these supports.
The whole roof at this point has been covered carefully with two layers of tar paper, then two layers of 6 mil polyethylene plastic, and then another layer of tar paper (as a protective barrier over the plastic).
Next we are building shelves inside, installing a door, installing a vent, and covering the thing with soil! And planting seeds on top, of course. The final thing we will do is plaster the gable end walls, once the straw-clay is totally dry (to avoid any potential mold issues).
Amazing Test
ReplyDelete