
The Green Roof, although everything but green at this point, is almost complete. The process of putting tarps over the whole building every time the sky looked threatening or a clap of thunder rang out was draining to our spirits and to our tight time schedule. Today is a day of celebration because the plastic membrane is installed and safely sandwiched between two cushioning layers of carpet, and so the building is protected from rain!
A lot has happened in the past couple weeks, leading up to the roof.
We had a big disaster a couple Saturdays ago. A disaster that changed everything. A disaster that turned me from a boy into a man, I like to think. Remember the stone "column" that I was bragging about in my last post? In addition to being pleasing to the eye, the design of the roof was depending on that stone column to be one of the main supports for the ridge beam, upon which all of the rafters would rest. Well, on this particular Saturday morning Eric and I were being driven to a local sawmill by Galen (from Pickards Mountain) and his beast of a truck to make a lumber pickup. I got a call from Mia 15 minutes into the ride: "Greg, have you looked at the house yet today?" "No........... why?" "Greg, how is your day going so far?" "Mia, just tell me what happened." It turns out that the great stone column had made a pretty good attempt at becoming one with the earth:

Perhaps you are considering this news, and thinking: "Gosh, he's not much of a builder. Does he know what he's doing?" Come to your own conclusions, of course. My own justification for not knowing what I'm doing is that it seems like it would be boring. Intrinsic in "knowing what you are doing" is having already done it once before. My thirst for experimentation is too great. A lesson was learned. I ended up staying up until 1:30 in the morning that night with my graph paper, brainstorming a complete re-design of the roof structure with the lumber that we had bought that morning, plus the addition of some harvested roundwood.
The following day, Nephew Ian (and sister Elaine) came by for a visit!
 Ian looks deceptively tiny here, but someday he will be able to rest his chin on that windowsill without tippying his toes.
 Here is that little porthole window, in-the-making. There is a small bamboo "header" above it, which left a gap above the glass into which we stuffed straw. We proceeded to cob over the whole thing. The purpose of the straw is so that when the cob settled, the straw will compress without breaking the window.
 Here Ian collects "smush."
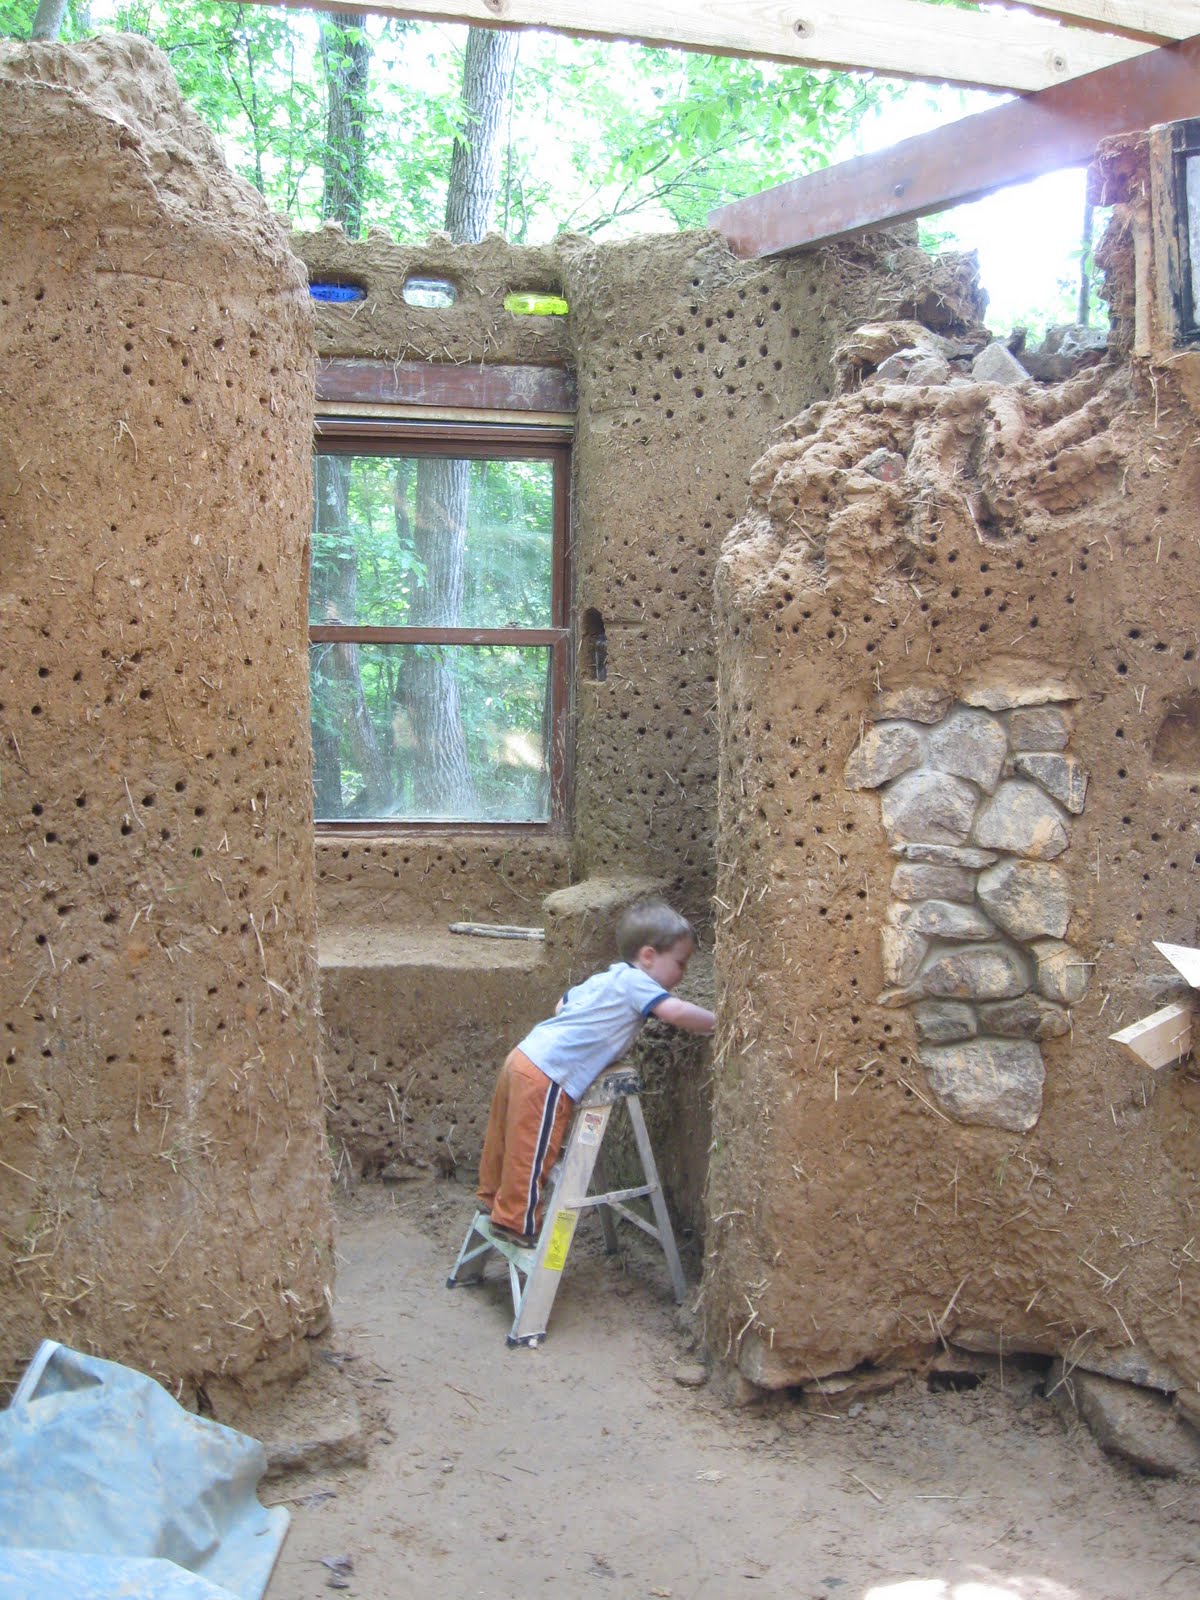 And applies it - with the help of a ladder - to the mudroom bench.
 The main rafters run North-South.
 To get the protective overhang we wanted, we had to scab lengths of lumber onto our rafters. We attached them with dowels.
There was no need for a ridge beam in the new roof design. However, we decided we still wanted to have a small ridge beam in the mudroom, to carry the load of the proposed roundwood rafters. Here is Chainsaw Mike harvesting a diseased Cherry tree for us:

 Eric uses a draw shave to de-bark the Cherry beam and clean it up.
 Our roundwood rafters. These trees were pulled from the debris after the local power company ransacked a strip of forest to make adequate room for the power lines.
 The decking was a special-order from the sawmill. Boards of these dimensions (really wide, yet really thin) are quite uncommon, but perfect for our curvy roof.
 In the corners, we decided to go with radial rafters to accentuate the curve of the cob walls. Notice the deadmen between all of the radials. After they were set properly, I stuffed cob in all of the negative space:
 On the walk up from the road.
 Setting the Cherry beam in place.
 Rotating it 180 degrees so that the crown was up.
 Eric about to shimmy out on the beam to attach the first roundwood rafter.
 The roof starts to take shape (what shape we had no idea, as we were just designing on-the-go).
 All decked out.
Shots of the Northwest corner (my favorite):


 Notice: 1. glass bottle windows, 2. roundwood rafters, 3. cob ceiling, 4. the subfloor in the mudroom is poured, and 5. the big beam at the top right corner of the photograph. This is the main element that allowed us to forget about our stone column and move along with the completely re-designed roof. It bears the weight of 6 or 7 rafters, and the column can be re-built up to it (with just cob!) slowly and surely.
There is a concept called "total knowledge," which refers to the depth of knowledge that a start-to-finish builder has in regards to his or her project. I first found total knowledge when the cottage at Pickards Mountain was complete, and I realized that I am the only person in the entire world who knows everything about that building. This time around, I share this honor with Eric. Here's a good example of TOTAL KNOWLEDGE:
 This crazy bump of decking was very, very custom-built, and quite odd. Its function is to cover up the area of the roof under which the cob ceiling lays, so that when people walk and dance on the roof in years to come, the delicate earthen ceiling will remain undisturbed.
 The outside edge of the decking was rounded with a micro-plane so that when the impermeable membrane is installed and wrapped over the edge, it doesn't get stressed over a sharp corner.
 Putting in the final screws.
 Pounding in the nails one last time.
 Sweeping the roof.
 Getting the first layer of carpet up. This will act as protection (beneath the membrane) from any nails that might pop up over the next 5oo years.
 Mia and I checked meticulously for staples/debris/splinters/ANYTHING that could damage the membrane.
 The plastic membrane was laid, and I screwed the fascia boards on around the edge of the roof. The fascia both secure the membrane in place, and give the living layer an edge to rest against.
 We had some scrap pool liners, which were placed on top of the plastic to give an extra layer of protection, as well as water resistance. I trimmed the liner to sit right up to the edge of the fascia boards.
 This is what the building looks like right now, ready to handle some heavy rain.
Not too much more to do before I head off for the summer and let everything dry and settle...